A chassis number is a serial number used to identify a motor vehicle manufactured before 1989. It is a series of numbers or letters attached to or stamped on a vehicle by its manufacturer. You can usually find a chassis number in the engine bay or on the chassis itself. The chassis number may also appear on the vehicle registration papers.
The chassis number is the last six digits of your car’s Vehicle Identification Numbers (VIN), so you need to find the VIN to determine the chassis number. Cars and motorcycles list the VIN in different places, so where you look will depend on the type of vehicle you have. The engine number is the number that is stamped on your vehicle’s engine. If you are having trouble finding the VIN or engine number on your vehicle, there are several places that you can check.
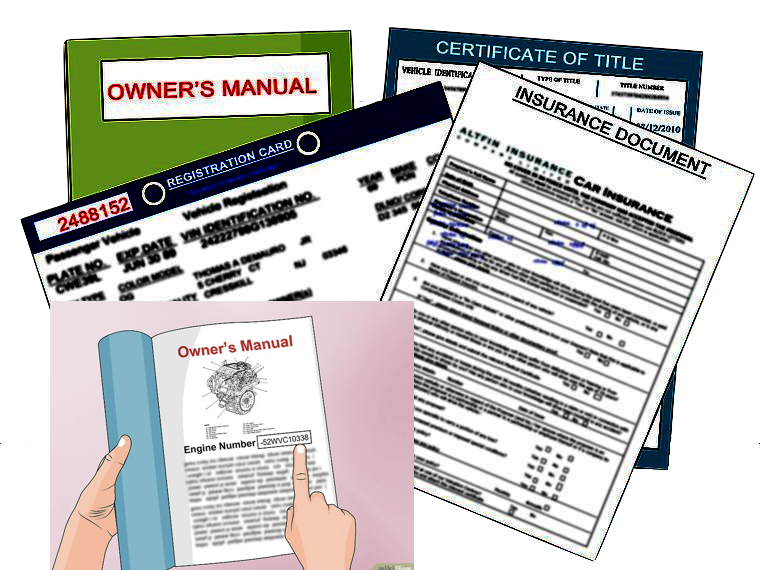
1.Check your paperwork
If you do not have access to your vehicle or if you do not want to go looking around the vehicle for the VIN, there are several different pieces of paperwork that should include the VIN. Some of the documents that you can check include:
Title
Registration card
Owner’s manual
Insurance documents
Body shop repair records
Police reports
Vehicle history reports
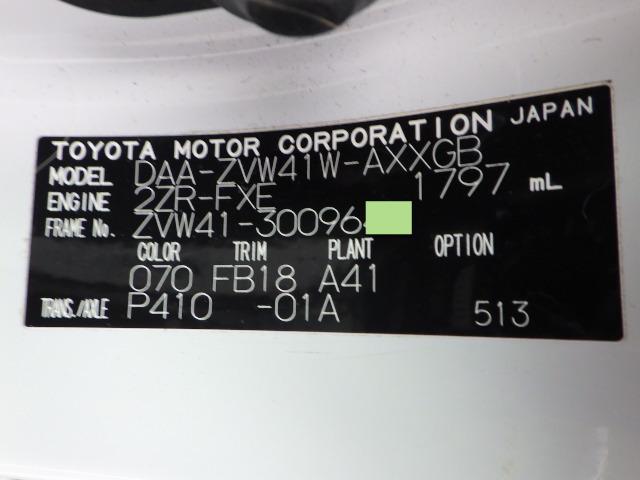
2.Find the ID Plate on Your Vehicle
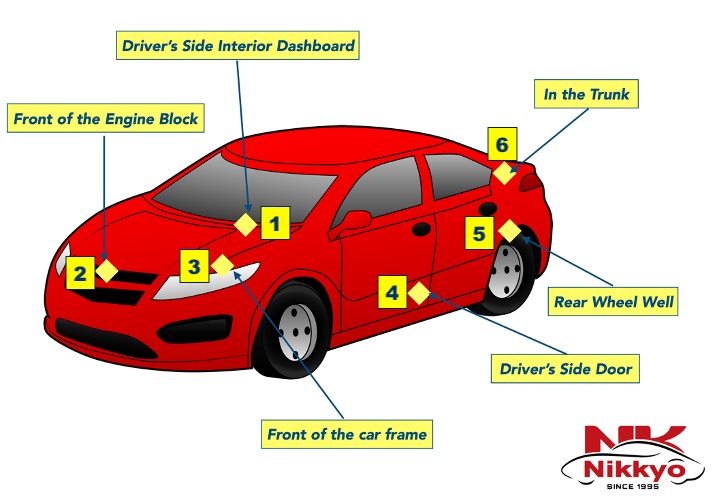
The ID plate is usually located on the firewall in the engine compartment or on the center pillar. You can also find the Chassis Number (VIN) on the locations below:
Front of engine block under hood
Front end of frame (old cars)
Driver's side interior dash
Driver's side door jamb (inside)
The easiest place to find the VIN on your vehicle is right on the lower left corner of your dashboard. You should be able to read the number by looking through your windshield on the driver’s side of your car.
You can pop your hoodand look at the front of the engine block. The VIN number may be written there on the block.
Sometimes the VIN is written on the front of the vehicle’s frame, somewhere near the windshield washer fluid container. You go to the front of the car, pop your hood, locate your window washer fluid container, close the hood, and then inspect the vehicle’s frame near this area of your vehicle for the VIN.
The VIN might also be located in the driver’s side doorjamb or on the doorpost. Open your driver’s side door and look around the edges of the doorjamb for a little white sticker.
If your VIN is on the doorjamb, then it should be on the area of the doorjamb just below the level of the rearview mirror. The VIN number may also be on the opposite side of the driver’s side doorjamb, near where the driver’s side seatbelt latches.
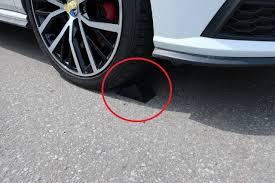
Peekunder the wheel well. Another place you can check is under your rear wheel well. You will probably need a flashlight to see the VIN if it is written there. You simply go to the back of your car, get down on the ground, and look up at your wheel well. Check both sides to see if the VIN is recorded there.
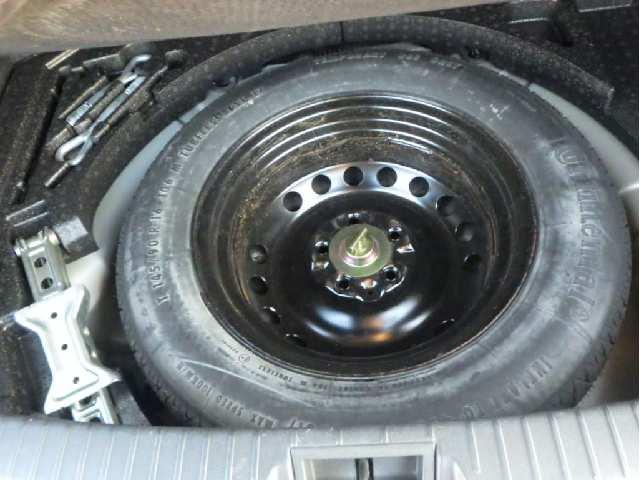
If you have a spare tire in the back of your trunk and you haven’t found the VIN anywhere else, it might be back there. Pop your trunk, remove the spare tire, and look in the space where the spare is usually kept. The VIN may be written in this area.
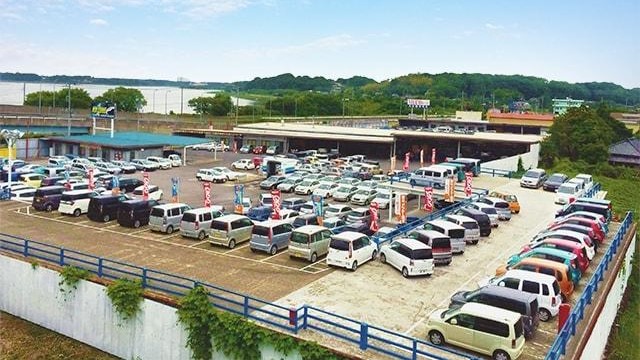
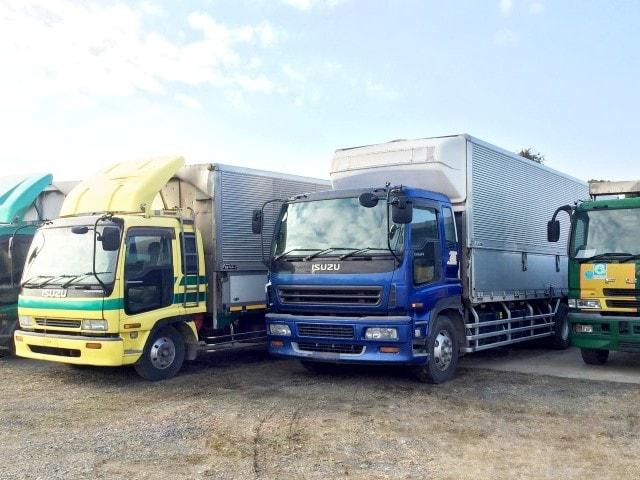
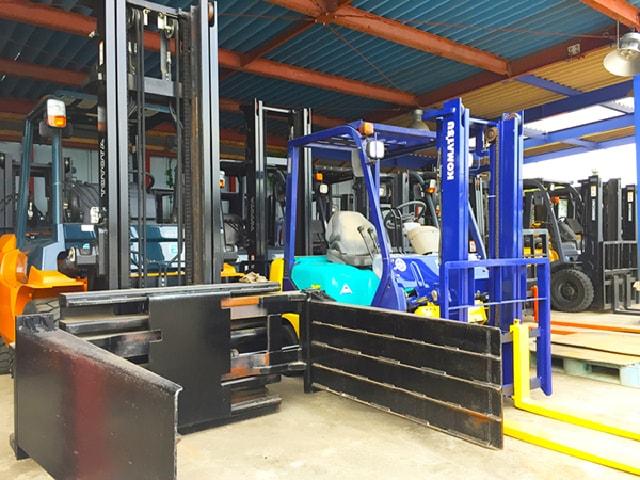
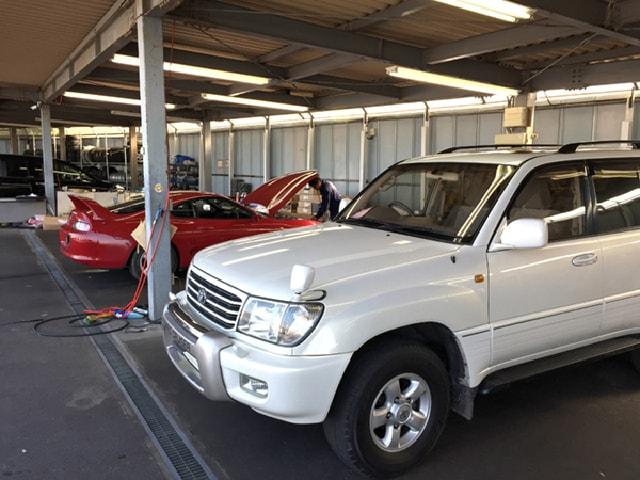
Japan is home to the worlds strongest manufacturers of automobiles. The names Toyota, Nissan, Mitsubishi, Mazda all speak for themselves. They are signature brands of top quality and highly reliable vehicles.Nikkyo Co., Ltd.'s primary business is exporting second-hand Japanese vehicles, trucks & forklifts to countries around the world.
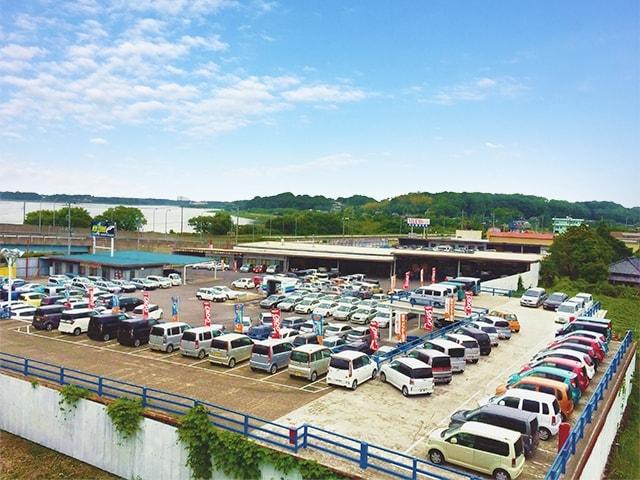
Nikkyo has 3 private motor pools that measure to 60,000 sq meters.Our facilities can handle up to 3,000 vehicles at one time.
Nikkyo consists of highly trained professionals, working together as a team to help export our customer's vehicles. Our team is made up of:
Professional Vehicle Buyers Years of vehicle experience help perform accurate inspections and spot problem vehicles. Our buyers cover ALL auctions in Japan and know which cars to buy and which cars not to buy.
Multi-National Sales Team Our sales team can speak English, Russian, Spanish, Chinese, Mongolian, Swahili and more. Every customer has a personal sales representative assigned to handle all inquiries.
Nationally Licensed Auto Mechanics & Bodywork Specialists Nikkyo can handle oil changes to full engine overhauls. We provide a full line of servicing options, tuning and bodywork.
Parts Department Full service parts department capable of providing quotations and fast air/sea delivery on any part you need.
Veteran Logistics & Shipping Department For fast delivery and mistake free documentation. We can transport vehicles from Japan to anywhere in the world!
Nikkyo's private motor pool, located in Ibaraki, Japan, measures over 60,000 square meters and can handle over 3,000 vehicles at any given time. Our yard is equipped with the following facilities:
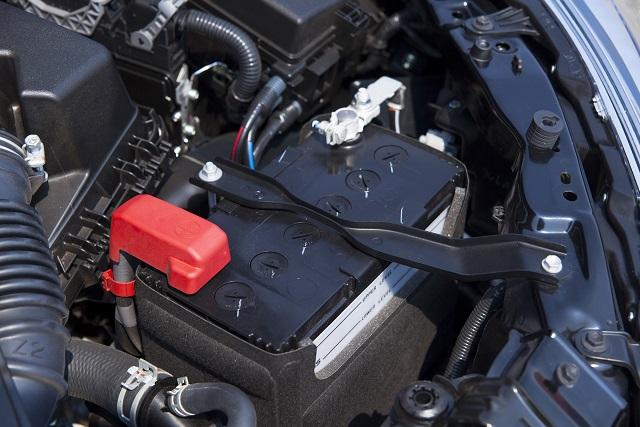
Из-за часто включенного обогрева салона, запуска холодного двигателя влекут негативные последствия. Поэтому с наступлением весны необходимо провести профилактические мероприятия.
Проверьте уровень заряда батареи и почистить клеммы от окислов и налета. Если аккумулятор уже несколько лет – замерьте уровень электролита. Следует помнить, если количество электролита уменьшилось не из-за испарения, а из-за утечки или разбрызгивания оного, то нужно подливать электролит, а не воду.
2.Масло двигателя
Замену масла весной проводить не следует. Разумеется, если у вас не дизельный мотор. Для таких агрегатов специалисты советуют проводить замену строго по сезонам. Для обычного бензинового двигателя, в котором используются современные синтетические и полусинтетические масла, менять масло лучше по пробегу.
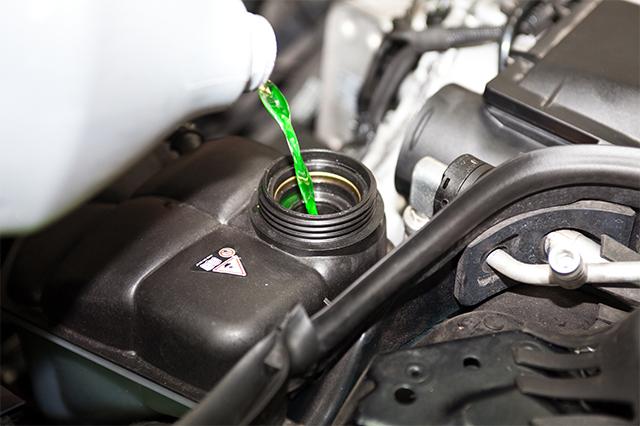
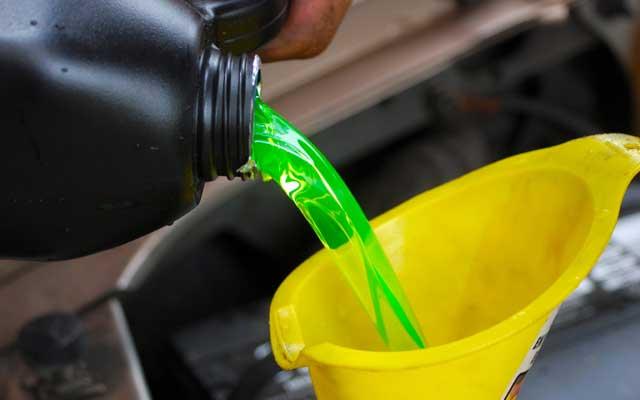
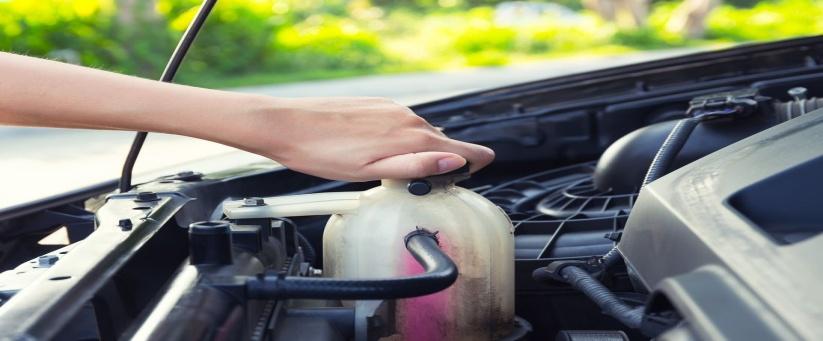
3.Технические жидкости
Вне зависимости от времени года и условий эксплуатации регулярно проверяйте объем антифриза в бачке, тормозную жидкость и прочие технические жидкости. При низком уровне долейте до необходимого уровня. Помните, что какие-то виды жидкостей надо мерить на остывшем двигателе, а некоторые на прогретом.
4.Замена шин
Замена зимней резины на летнюю имеет важные особенности. Ночью могут быть заморозки, изменение температуры приведет к гололеду.После установки летных шин проверьте надежность затяжки болтов колес, давление баллонах.
Nunca se sabe quando nossos carros podem nos deixar na mão, por isso é sempre bom andar preparado. Aqui vai uma lista de ferramentas (itens) essenciais ou extremamente úteis que poderão lhe salvar em caso de problemas .
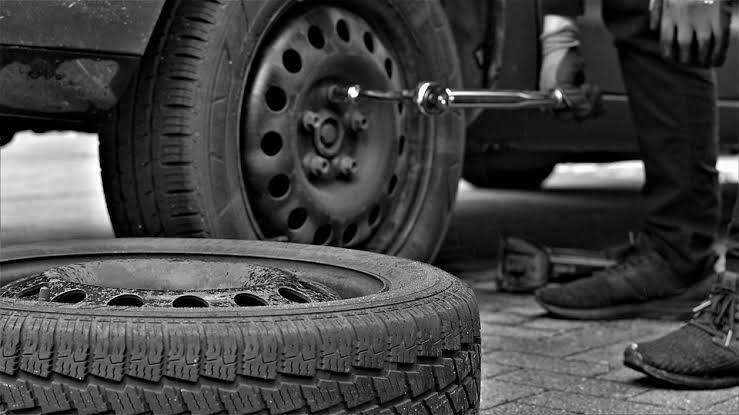
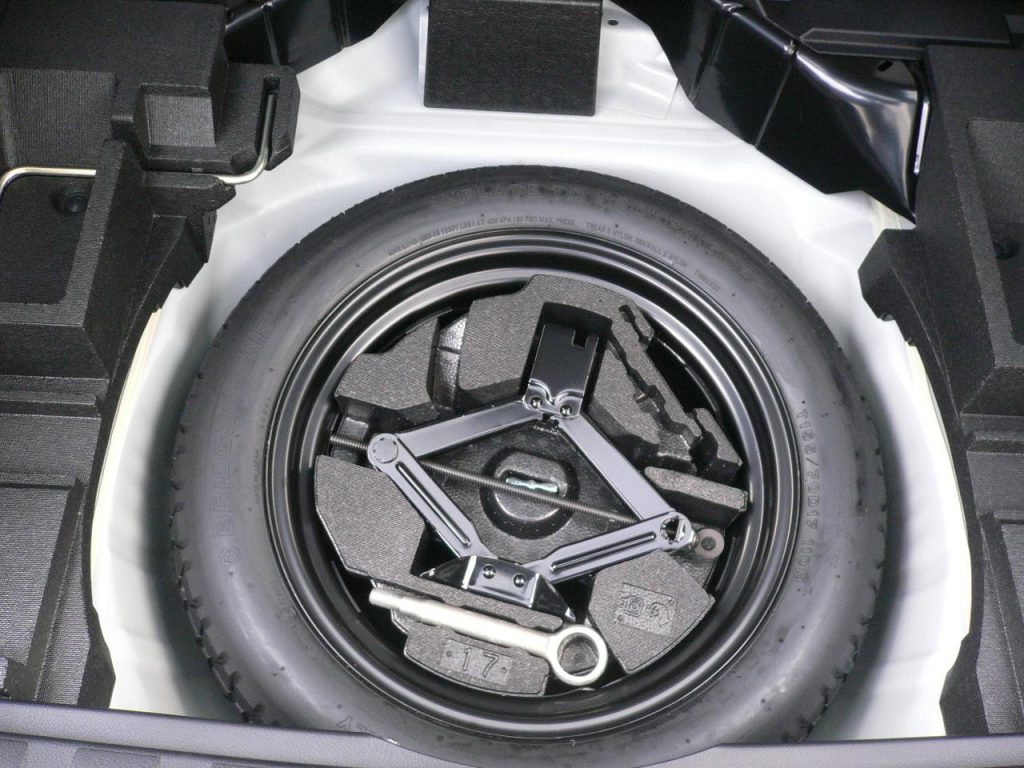
1 – Kit para Troca de Pneus
Ande sempre com o macaco hidráulico, chave de rodas, triângulo e claro, o pneu sobressalente em seu carro. Estes são itens essenciais em sua viatura.
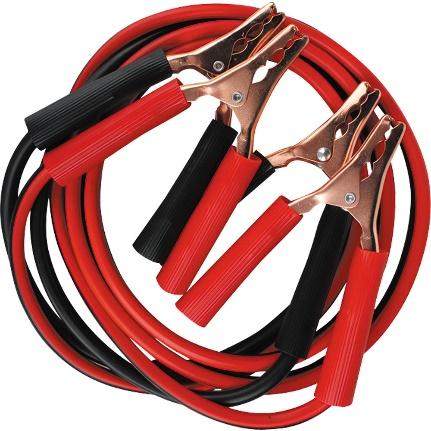
2 – Cabo para dar Carga na Bateria
Muitas vezes podemos esquecer uma luz dentro do carro acesa por muito tempo, ou algum outro acessório eléctrico do carro em uso enquanto o motor esta parado por muito tempo descarregando a bateria.
Se tiver um cabo de carga em seu carro, basta solicitar a alguém passando de carro no local que lhe deixe puxar carga para uma partida e pronto, uma vez o motor em funcionamento, o alternador fará o serviço de recarregar a bateria.
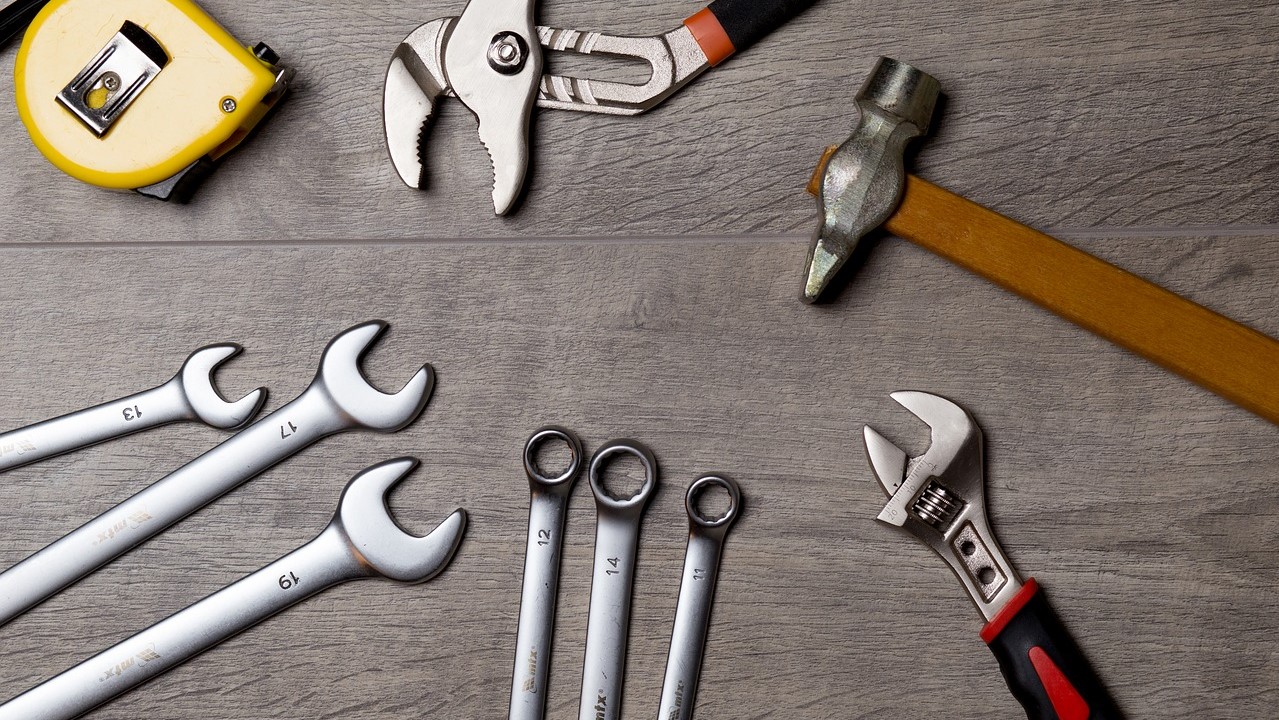
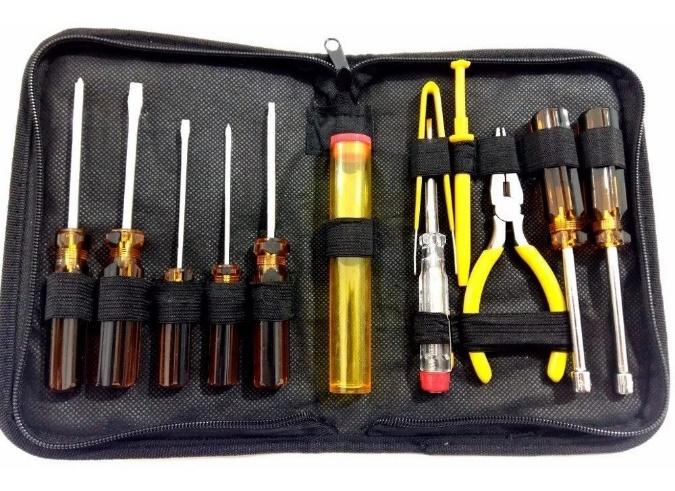
3. Ferramentas Básicas
Sempre bom andar com um kit, mesmo que simples, de ferramentas, com duas chaves de fenda (+ e -), um alicate universal e um alicate pequeno de ponta. Muitas vezes precisa apenas apertar um parafuso para que seu problema seja resolvido.
ITENS ÚTEIS.
Se possível, sempre ande com estes itens em seu carro, também poderão lhe tirar de um sufuco.
4. Fusiveis
Sempre leve fusíveis extras em seu carro, pois são fáceis de queimar, e pode perder muitas funcionalidades do carro caso aconteça. São extremamente fáceis de repor.
5. Fitas Adesivas e Braçadeiras de Plástico
Parece até brincadeira, mas uma fita adesiva ou a braçadeira plástica pode fazer um reparo temporário até que encontre um mecânico para efetuar o reparo definitivo.
Com estes itens em seu carro, com certeza estará bem preparado para diversos contratempos que possam aparecer. Nunca se esqueça de procurar um mecânico experiente após fazer um reparo temporário, para que possa usufruir mais tempo de sua viatura.
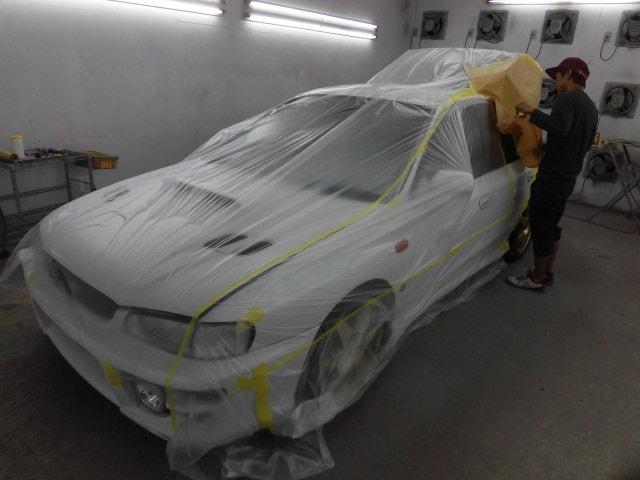
Photographing the car for your listing is an important part of the sales process. These photographs will give buyers their first impression of the car.
Like anything you're selling, you need photos to show off your car in the best possible way. Check out this comprehensive guide to to help you do this. Photoshoot Guidelines
The best shots for showing off your car are:
From the front – stand out to one side so you get the front and the length of the car, to maximise how much of it you can fit in the photo.
From the back – again, stand out to one side and take a shot of the back and down the length of the car.
Side on – getting in all tyres and panelling.
Stand outside and photograph the interior through an open window/door.
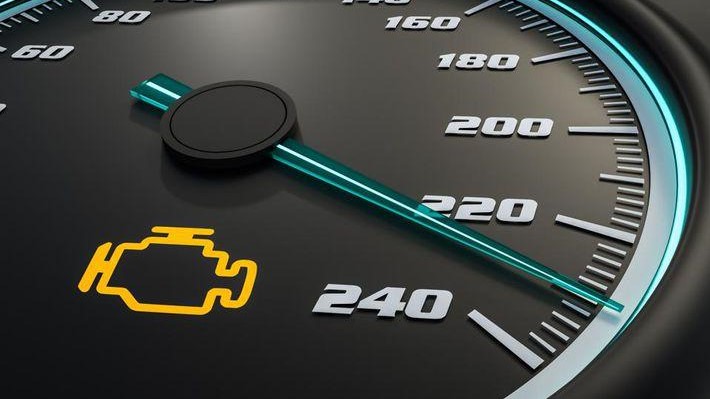
Dashboard - show the odometer reading and any alert lights that may come on.
With the hood of the car open, showing off the engine.
Any service papers or licencing that you would like to include.
Other photo taking tips include:
Take photos in front of a plain background, e.g. a neutral wall – ideally, one that is lighter in colour than the car so it stands out.
The best time of day to take photos is a couple of moments before the sun is either rising or setting. This way the light isn’t too harsh against the car paint.
Hold your camera low to the ground, about the height of the bonnet.
Photograph any outstanding features close-up.
Want to import a car from people who know their stuff? Visit www.nikkyocars.com to get in touch or see our range of stock direct from Japan.
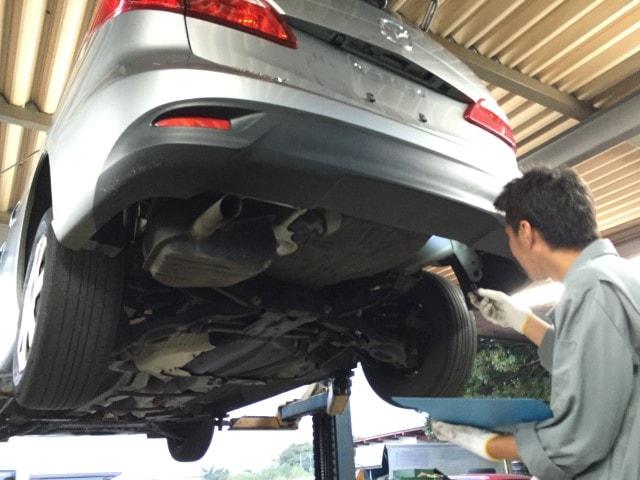
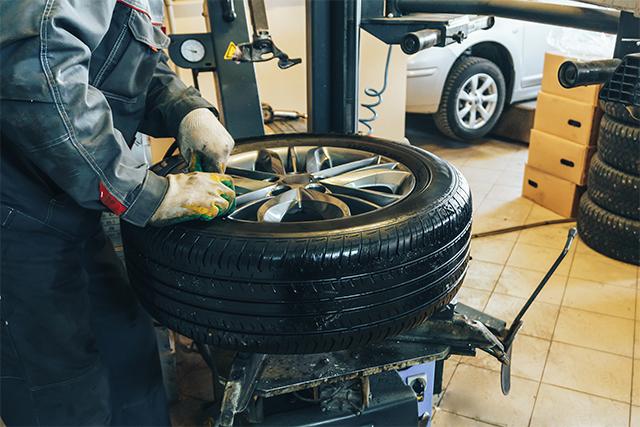
There are some parts in your car that require you to pay constant attention, as their shelf life may be less than other parts of the car, or be affected by several other factors that the car is exposed to permanently while walking on the roads, among those parts is the car tire.
Like all other parts of the car, the car tire has a specific life span that may be affected by driving conditions. Rugged and difficult, so the life of your car's tires will definitely be affected by your driving style and the conditions under which you drive.
Therefore, it is natural that the shelf life of your car tire is different from that of your friend's car, for example, since in addition to driving conditions and style, each type of rubber is different from the age of its counterparts in the market, each company recommends changing the tire in different periods of the other, so the answer to the question of changing the car tire after how many kilometers will not be completely accurate.
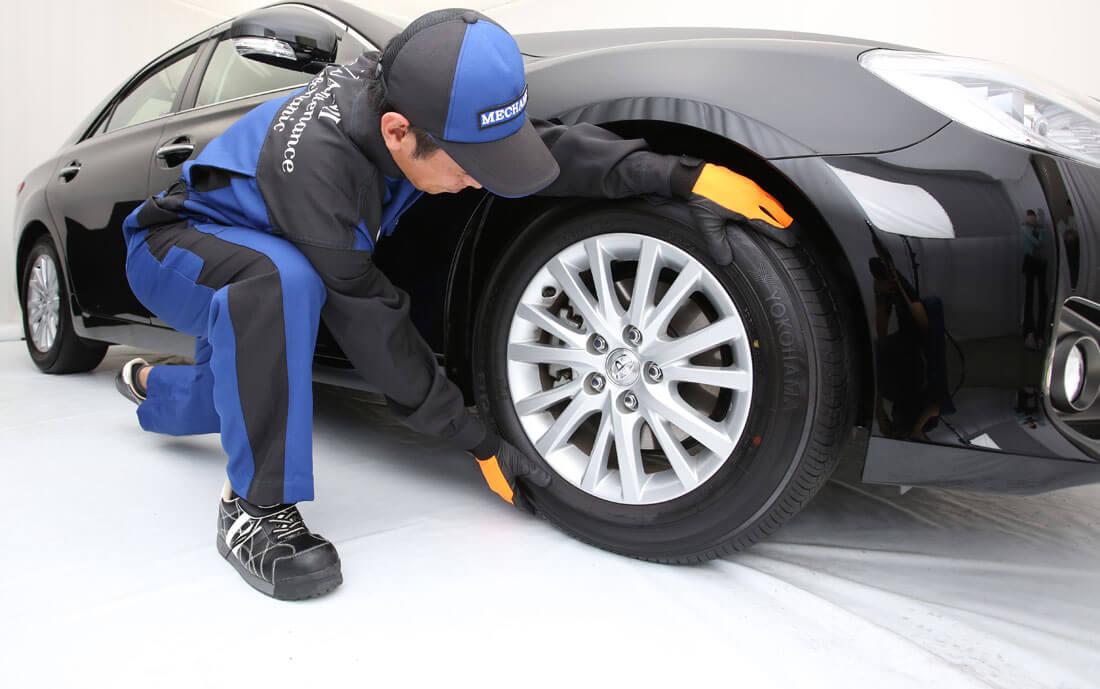
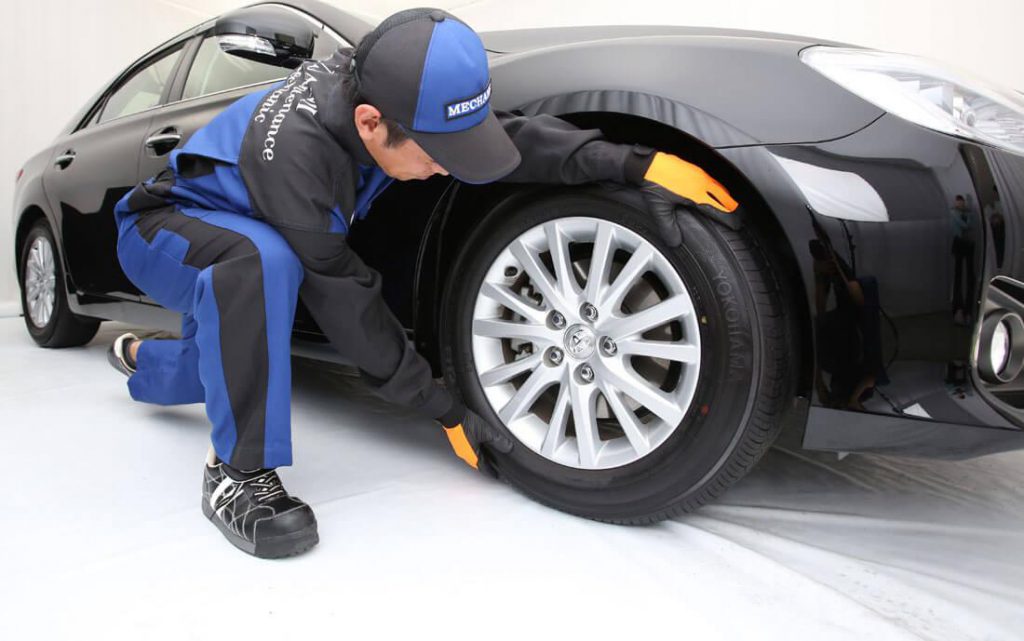
Do my tires really need replacing?
Some mechanics and tire men will tell you your tires need replacing by simply looking at them and telling you they're worn.
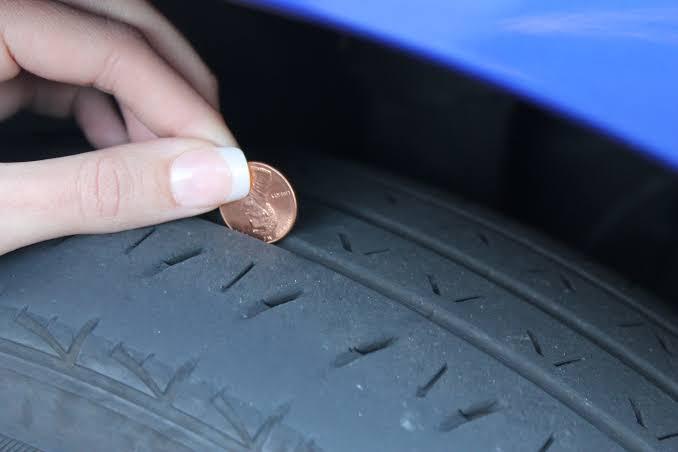
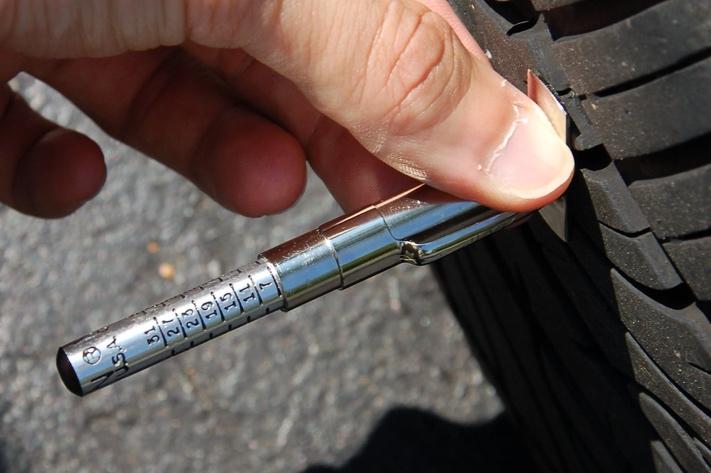
Don't take their word for it, check them yourself. Visually inspect them for wear and damage, and check the depth of the grooves.
You will have to change it after an average cut of 30,000 km to 60,000 km, or after about three to five years of continuous use have passed, whichever comes first.
In all cases, after you know how many kilometers the car tire needs to be changed. You should check them periodically, especially when you are on a long road trip with the family.
The tire tread depth or depth of engraving, on the surface of the rubber, If the depth becomes less than 1.6 mm for ordinary tire or less than 3.2 mm for the tire used on wet roads, this means that your tire must be changed.
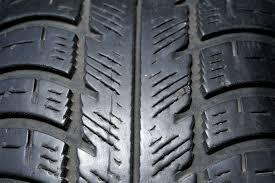
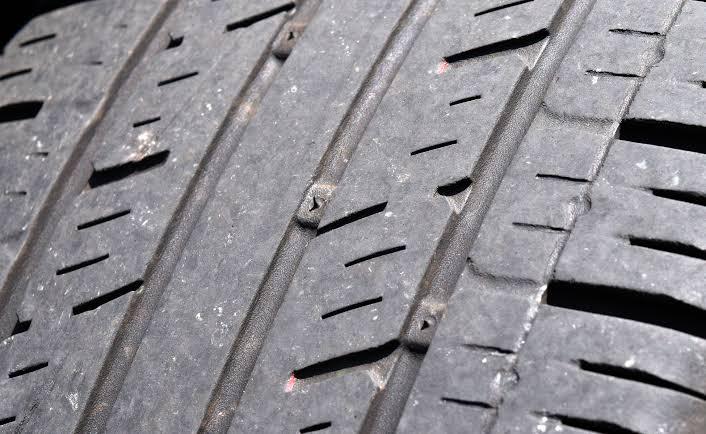
Tread Wear Indicator, which are lines that are put into the new tire by the manufacturer, and these lines become visible only after the tire is worn out.
Cracks in the sides of the tire, you have to check the sides of the rubber well to note any cracks or pieces in the rubber structure that causes air to leak from it.
Bulges in the rubber frame, this is one of the signs that also require you to replace the rubber to end its shelf life, it indicates that the rubber surface has become very weak and may explode at any moment while walking.
All of these preceding signs can be observed easily during a simple examination of the rubber tires, and upon seeing one of them you must replace the tire with a new one, to maintain a safe driving experience for you and your family.
And you can choose the right rubber for your car by referring to your car manual, to view the pages dedicated to the rubber model of your car and its sizes and even the types suitable for it from a large variety and variety provided by the rubber manufacturers in the current market. Or you can find out the dimensions of the rubber with a sticker attached to the inside edge of the driver's seat, and you will also find the appropriate air pressure and the percentage of load capable of carrying it on the same label.
You can also translate the codes written on the car rubber itself, where you will find that there are numbers and letters written on it, each of which means something, as it is shown in the following example 245 / 40RF19 94W:
245: Indicates the width of the tire in millimeters. 40: indicates the ratio between the height and width of the tire. 19: Indicates the appropriate rim size for the tire. 94: is the load indicator. W: indicates the maximum speed a tire can withstand.
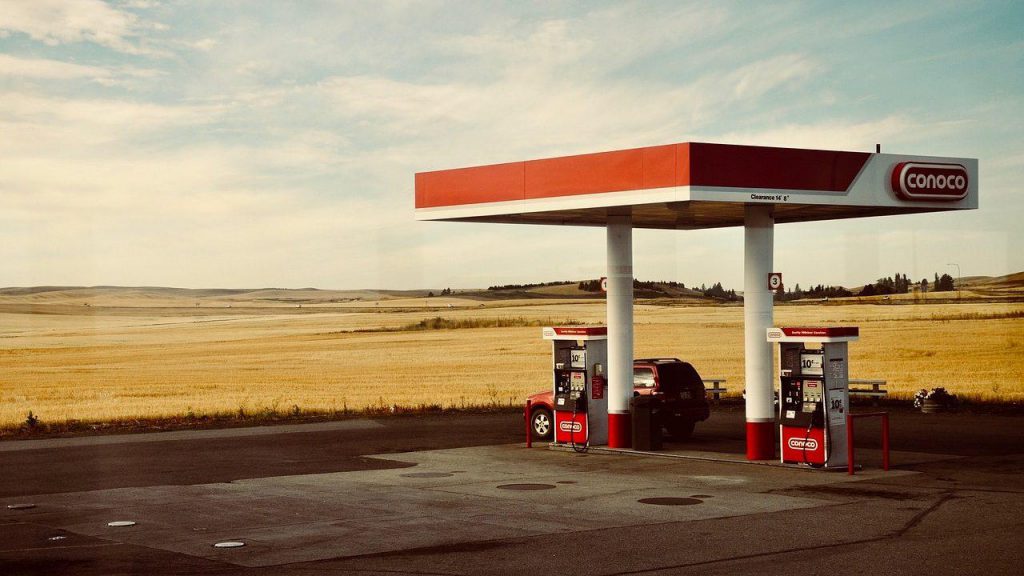
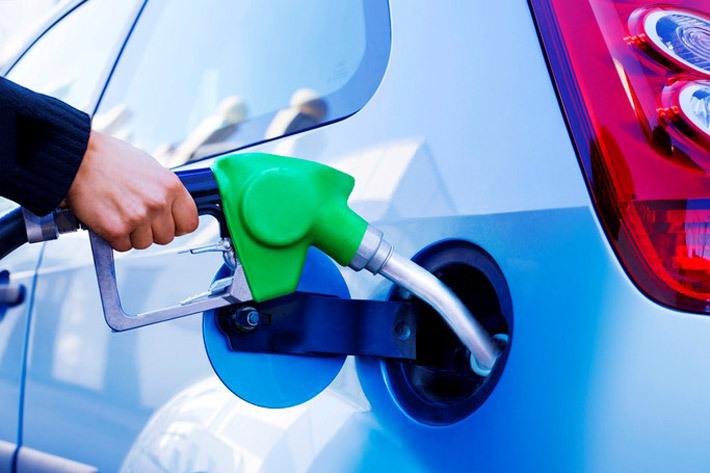
If you have have ever purchased fuel for your business, you know that there is a choice between regular and unleaded gasoline. There is usually a variance in price between these two, but it is important to learn the other differences between them. This is especially true if you provide fuel to customers or run a fleet of vehicles. Find out below if you are making the best decision when purchasing your fuel.
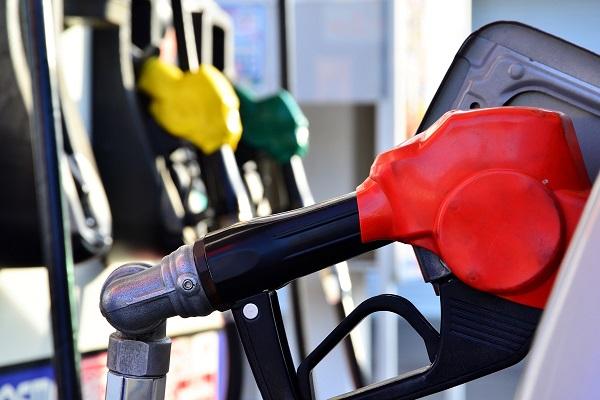
Unleaded Gas (Regular)
The most commonly used fuel for
vehicles is regular unleaded gasoline (RUG). It does not have any lead
compounds, which makes it better for the environment and less hazardous to your
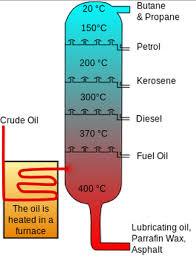
health. RUG is flammable and is a byproduct of crude oil. The octane rating for
this fuel is 87, which refers to its ability to deal with improper fuel
combustion in an engine.
Premium Gasoline
Regular unleaded and premium gasoline share many characteristics. Premium is also derived from crude oil and it is a combustible liquid. Octane ratings of premium gas vary, but are usually 90 or higher. Premium fuel is also called “high octane gas.” It produces less pollution and it keeps your engine cleaner, which makes it a great choice for many vehicles.
Comparing the Octane Ratings
Your car has an internal combustion engine that works by compressing a mix of fuel and air, igniting the spark plug and creating a controlled explosion. When this explosion occurs, it powers the engine and makes it possible for your vehicle to run. If the fuel mixture ignites prematurely, it will create an unstable explosion. If you hear knocking in your engine, it is likely that pre-ignition has occurred. It is more common to hear this in older cars and it will lower your car’s performance. Over time, the components in your engine will be damaged if this problem is not fixed. This is where octane ratings become helpful. They are usually a measure of how well the mixture of fuel can resist knocking or pre-ignition. The octane rating of 90 in premium gasoline means that it is able to withstand knocking just a little more than regular unleaded gasoline. This is not necessarily true for newer cars because the design of modern engines has improved performance and includes sensors to detect the issue. These vehicles can run almost as efficiently on regular gas as they do on premium.
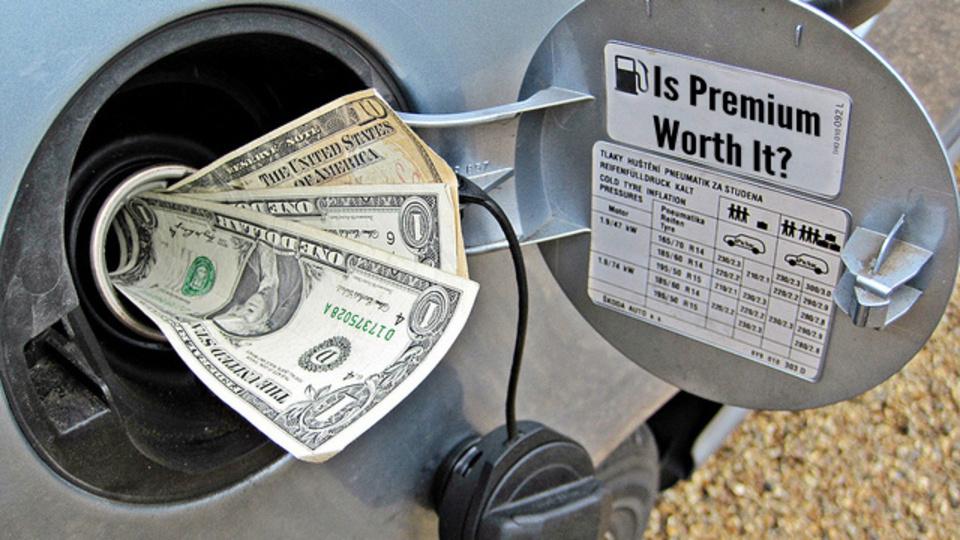
Comparing the Price of Regular and Premium Gasoline
Its higher octane rating is what makes premium gasoline more expensive than regular unleaded. Depending on your location, the price may vary. There is a general range of a 20 to 40 cents per gallon price difference between the two types of fuel. For frequent drivers, the higher priced fuel could cost up to hundreds of dollars per year, especially if the person drives their car more often. However, fleets may be able to save money by buying this fuel in bulk because it will help prevent wear and tear.
Which is More Suitable for Your Engine?
Both types of fuel are combustible, but regular unleaded gasoline will burn faster than premium unleaded. If your engine has a low compression ratio, and it does not need to produce a lot of power, then regular is fine for your vehicle. Engines with high compression ratios will function optimally with premium unleaded. If your engine makes use of turbo charging, this is especially true.
Find a flat, stable and safe place to change your tire. You should have a solid, level surface that will restrict the car from rolling. If you are near a road, park as far from traffic as
possible and turn on your emergency flashers (hazard lights). Avoid soft ground and hills.
Apply the parking brake and put car into "Park" position. If you have a standard transmission, put your vehicle in first or reverse.
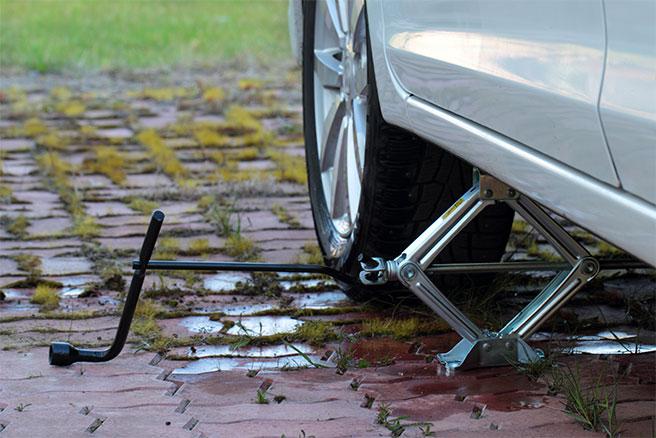
Place a heavy object (e.g., rock, concrete, spare wheel, etc.) in front of the front and back tires that you are going to change. Ensure that the jack is in contact with the metal portion of your car's frame.
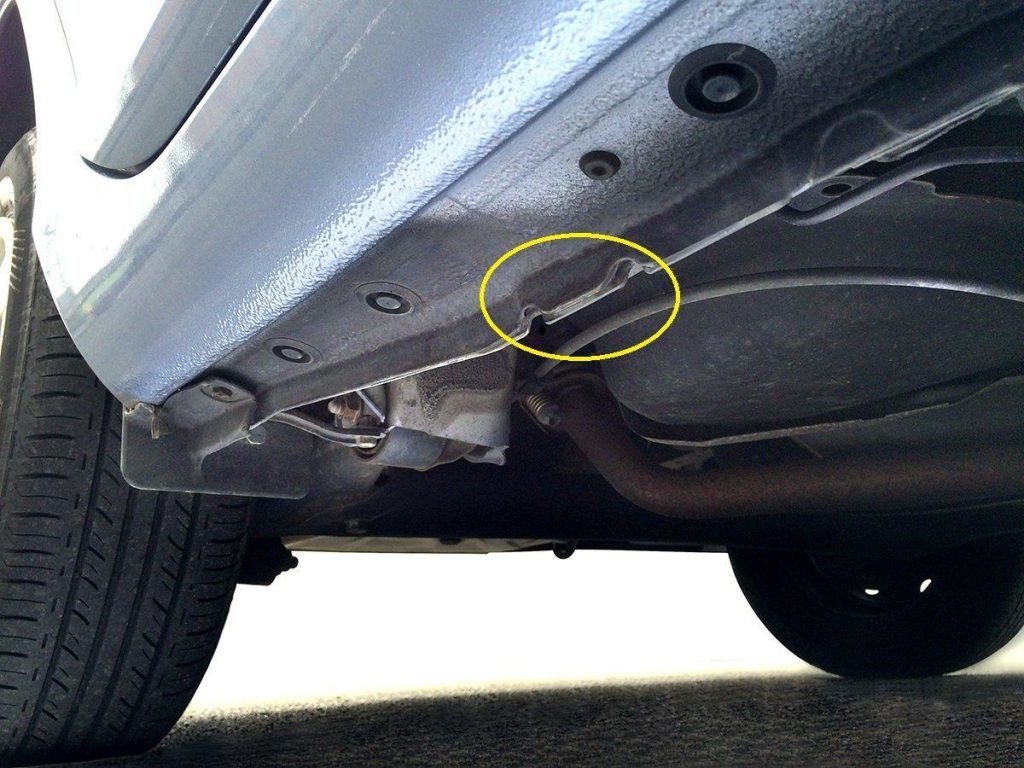
Many cars have molded plastic along the bottom. If you don't place the jack in the right spot, it will crack the plastic when you start lifting. If you're not sure about the right place to put the jack, read your owner's manual.
For most modern uni-body cars, there is a small notch or mark just behind the front wheel wells, or in front of the rear wheel wells where the jack is intended to be placed.
For most trucks or older cars that have a frame, look to place the jack on one of the beams of the frame just behind the front tire or in front of the rear tire.
Raise the jack until it is supporting (but not lifting) the car. The jack should be firmly in place against the underside of the vehicle. Check to make sure that the jack is perpendicular to the ground when you first loosen the nuts, you'll make sure that you're turning the nuts instead of the wheel.
Use the wrench that came with your car or a standard cross wrench. Your wrench may have different sizes of openings on different ends. A correctly-sized wrench will slip easily over the nut, but will not rattle.
Try to prepare for any unforeseen tire changes by keeping the exact socket size for your lug nuts as well as a breaker bar handy in the trunk.
It can take quite a lot of force to break your lug nuts free. If all else fails, you can use your body weight or stomp on the wrench (be absolutely certain you are turning it the correct way - counterclockwise). However, using your body weight or stomping means you run the risk of stripping the lug nuts, as it is difficult to maintain full contact.
Pump or crank the jack to lift the tire off the ground. You need to lift it high enough to remove the flat tire and replace it with a spare.
As you lift, make sure that the car is stable. If you notice any instability, lower the jack and fix the problem before fully lifting the car.
If you notice the jack lifting at an angle or leaning, lower and re-position it so that it can lift straight up.
It is always a good idea to keep a small jack stand handy in the vehicle as well, in case the jack gives out during the tire change. Using both the small jack and the normal jack will keep you safe in the event of a jack failure.
Remove the nuts the rest of the way. Turn them
counterclockwise until they are loose. Repeat with all lug nuts, then remove
the nuts completely.
Although rare, some vehicles actually have reverse threaded lug nuts. These are usually much older cars from Chrysler and GM.
Remove the tire. Place the flat tire under the vehicle so in the event of a jack failure the vehicle will fall on the old wheel, hopefully preventing injury. If the jack is placed on a flat, solid base, you shouldn't have any problems.
The tire might stick due to rust. You could try hitting the inside half of the tire with a rubber mallet to loosen the tire, or use the spare tire to hit the outside half.
Place the spare tire on the hub. Take care to align the rim of the spare tire with the wheel bolts, then put on the lug nuts.
Be sure to install the spare tire the correct way and not backwards. The valve stem of a doughnut tire should face outwards, away from the vehicle.
If your vehicle uses acorn-style lug nuts, it is easy to put those on backwards as well. Be sure the tapered part of the nut faces the wheel when tightening it down.
Tighten the nuts by hand until
they are all snug. They should turn easily
at first.
Using the wrench, tighten the nuts as much as possible using a star pattern. To ensure the tire is balanced, don't completely tighten the nuts one at a time. Going in a star pattern around the tire, one nut across from another, give each nut a full turn until they are equally tight.
Avoid using so much force that you risk upsetting the jack. You will tighten the lug nuts again once the car is down and there is no risk of it falling.
Lower the car without applying full weight on
the tire. Tighten the nuts as much as possible.
Put the old tire in your trunk and take it to a mechanic. Get an estimate for the cost of repair. Small punctures can usually be repaired for less than $15. If the tire is not repairable, they can dispose of it properly and sell you a replacement.
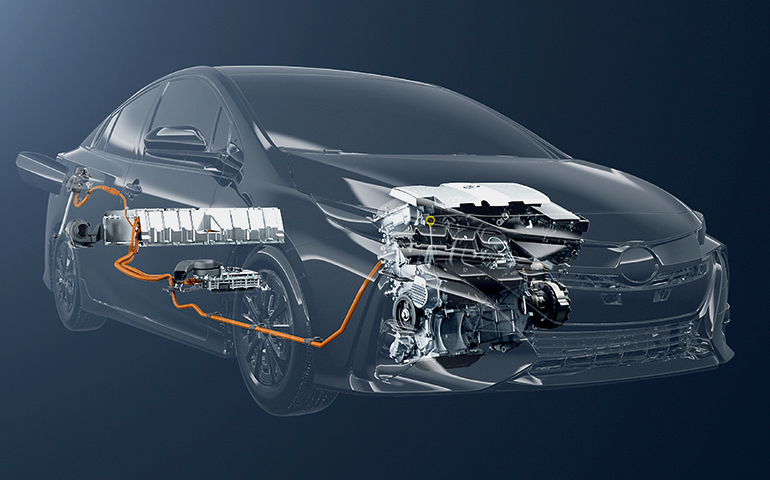
Last time, I've wrote about Nissan e-Power System. This time, I'll be talking about hybrid, and how to maximize the life of Prius hybrid battery. (This only applies if your hybrid battery is Nikcel-metal hydride battery.)
Be Easy on the Hybrid Battery. 1. Using the EV Mode When Starting To maximize the benefit, using the EV mode is the best way to save fuel and the environment. Sadly, that also means the battery will get stressed the most. The best way is to use the engine and the motor simultaneously. After accelerating to your target speed, then use the motor to cruise might be the most efficient way.
2. Not to Try to Fully Charge or Discharge the Battery This is also a method not to put the battery in too much stress.
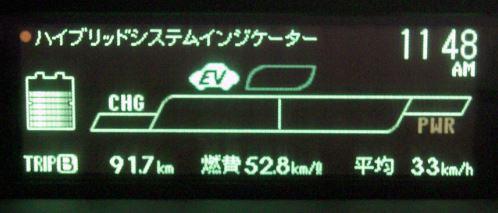
Not Leaving the Hybrid Battery Charging Status Low Firstly, the battery of the Prius is Nickel-metal hydride battery. That battery meter in front of you is not showing 0% ~ 100%. It is actually showing 40% ~ 80%. The reason is because this is the most efficient percentage to perform maximum performance longevity of the Nickel-metal hybride battery which Prius is controlling. When the meter tells you fully charged, it could be 80% ~ 100%, and if it show 0%, it could be 0% ~ 40%
For Nickel-metal hyride battery, leaving the battery with no juice is not a good idea. However, since the battery meter is only showing 40% ~ 80% (or more) the only thing you need to do is to leave 1 or 2 bars on the meter. The long and the short of it is, "Think your hybrid battery as same as the battery on your smartphone". To be honest, it is basically a trade-off between fuel price and the life of the hybrid battery. If you try to get maximum benefit on the fuel only, this method will be completely useless. I believe most of the people who buys the hybrid is to save on fuel price.
On the other hand, you will lose more than you earn when you need to replace the hybrid battery. Please be hybrid yourself too, and care about both fuel price/ enviornment and hybrid battery.
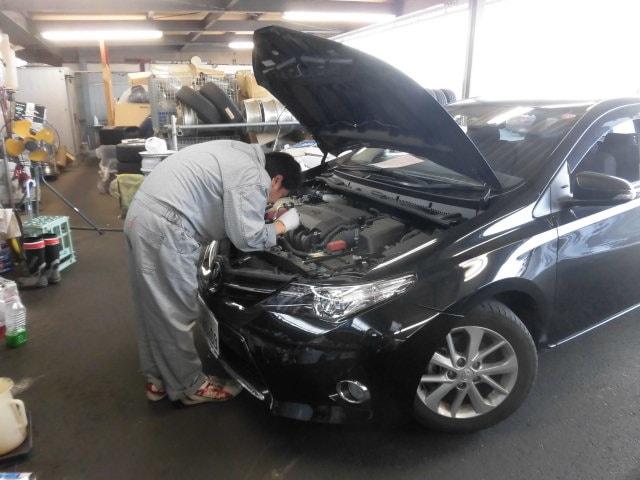
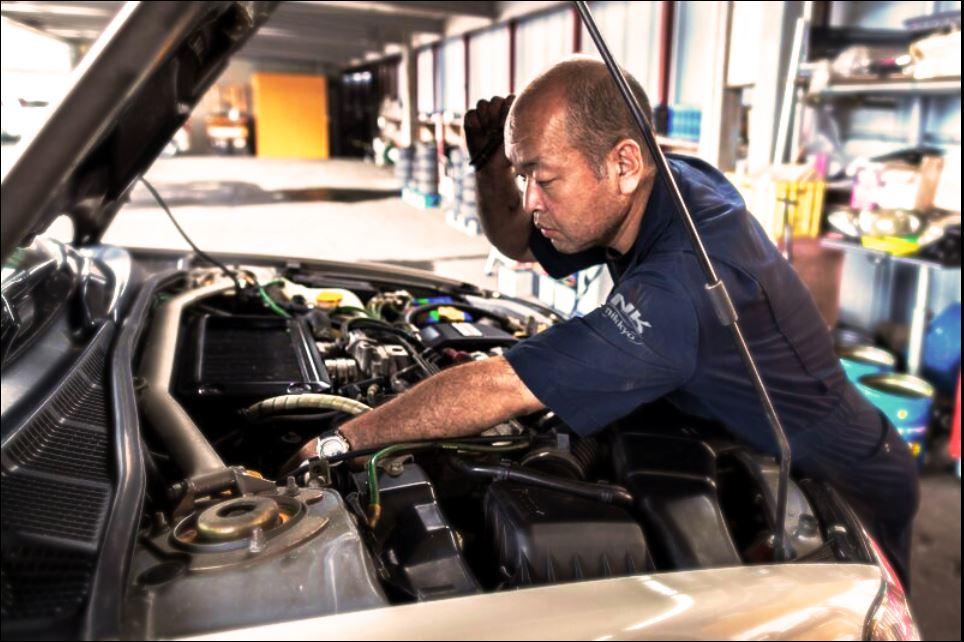
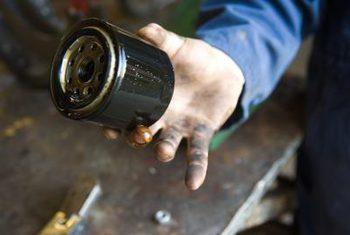
A primeira coisa que deve ser feita assim que retirar a sua viatura do porto, é verificar e trocar os fluidos e filtros. Óleo do motor e água/fluido do radiador devem ser os primeiros a serem verificados, e o óleo trocado imediatamente.
Um dos motivos dos veículos usados japoneses terem preços acessíveis, é porque ao serem comprados dos leilões, vão direto ao porto onde serão embarcados. Não há histórico de manutenção em praticamente todos os carros comprados de leilão, por isso é melhor garantir do que se arriscar.
Troque os filtros de óleo de motor e filtro de ar também, pois não sabemos a quanto tempo estão sendo usados, você não quer o seu carro novo rodando com fluido e filtros antigos, certo?
Faça uma manutenção periódica e sempre procure um mecânico experiente e de confiança que possa lhe ajudar tanto na manutenção do seu carro, fazendo assim que o mesmo lhe acompanhe por muito tempo, pois os carros japoneses são muito fortes e duram bastante, mas também precisam dos cuidados básicos.
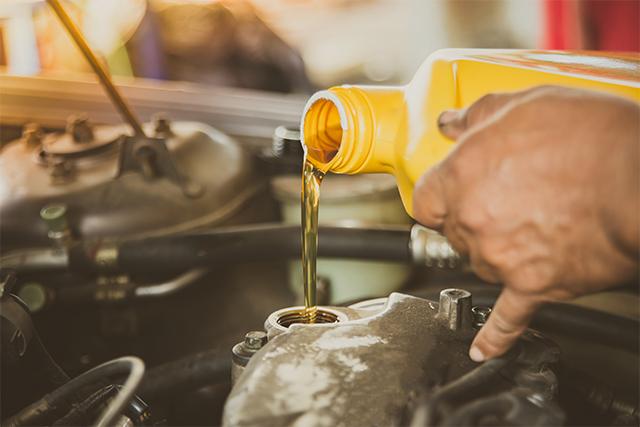
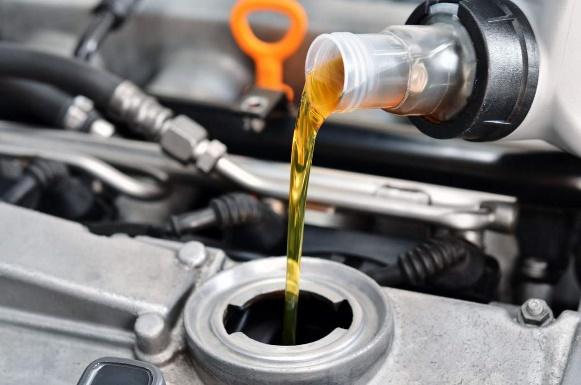
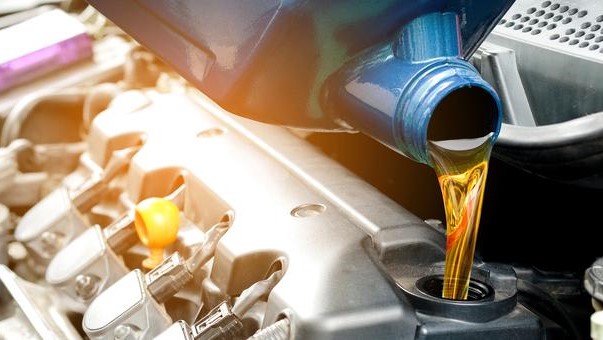
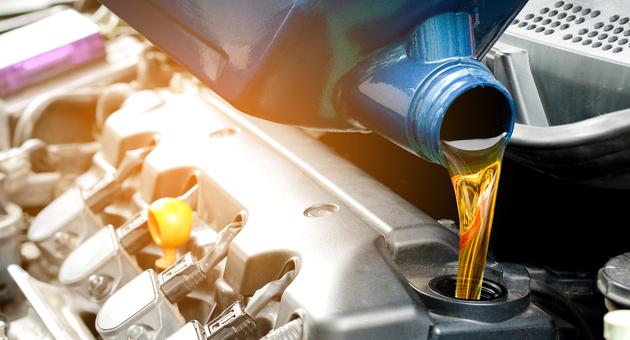
Changing the oil in your car is something that you can do by yourself. Although changing the oil might appear rather obvious, there are still a lot of folks doing it wrong. Making it an ugly chore or overpaying for oil changes they could do on their own. Plus, an oil change is the most important task you can do to make your engine maintenance. We’ll show you how to change oil and how to extend oil life.
You may have done it years ago. But with oil change shops charging more and more, it’s time to get back under the car and start saving big bucks. Plus, you won’t be pressured into buying overpriced add-ons (like wiper blades…etc) every time you go in for an oil change. We’ll show you how to change oil fast and painlessly. And we’ll show you some tips you may not know about.
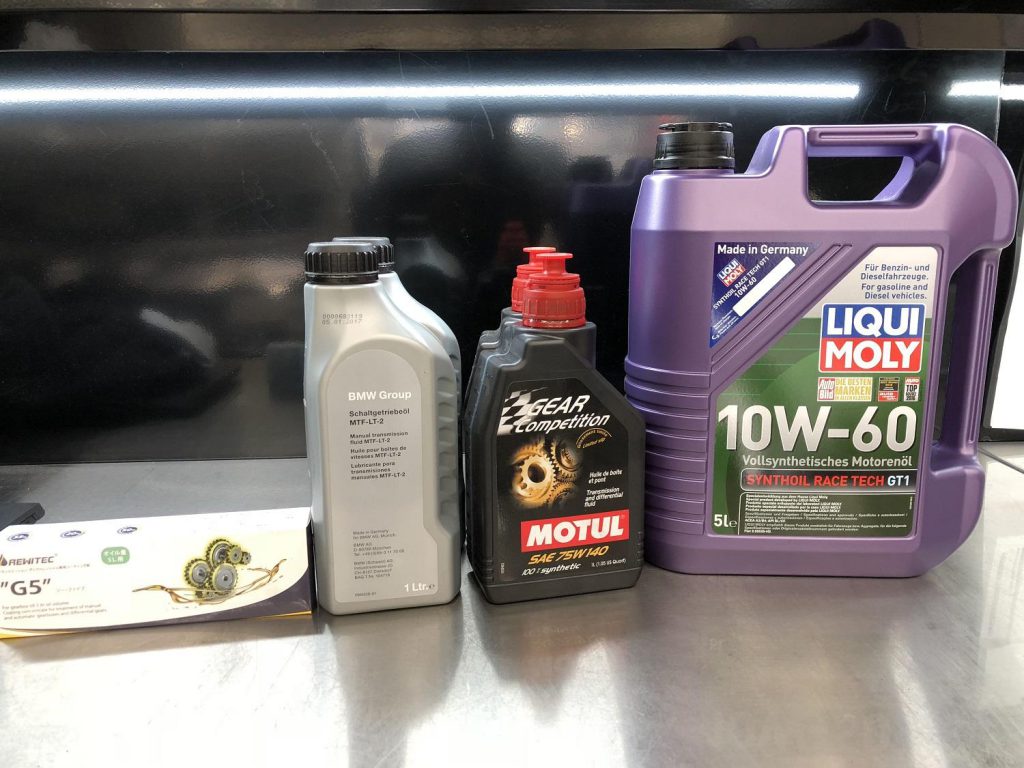
Before you head off to the auto parts store, consult your owner’s manual for the type and weight of oil specific to your vehicle. It’s especially important to follow the carmaker’s recommendations for oil viscosity. Late-model engines rely on oil pressure to regulate valve timing and apply the proper tension to the timing belt or chain. Substituting your personal preference for the manufacturer’s recommendations can result in engine damage, poor performance or even a “Check Engine” light might be on.
Don't Skimp on an Oil Filter & When to Change Oil in Car.
In the old days, oil filters were all pretty much the same inside. But not anymore. If your owner’s manual recommends extended oil change intervals (every 10,000 km instead of 5,000 km), you must buy a filter that’s rated to go the distance. In other words, don’t fill your engine with expensive synthetic oil and then spin on an economy filter—it won’t last and will decrease your oil life. Check the filter box, ask the store, or check the filter manufacturer’s website to make sure the filter you buy is rated for extended oil change intervals.
There’s a huge difference between an economy oil filter and high quality ones. But there’s only a small difference in price. If you use conventional oil and diligently change it every 5,000 km, you can get by with the economy filter. But if you regularly “forget” and go beyond that mileage or use long-mileage synthetic blends or full synthetic, spend the extra bucks on a better filter. Consider at these cutaway filters and you could see why the premium filter is a better choice.
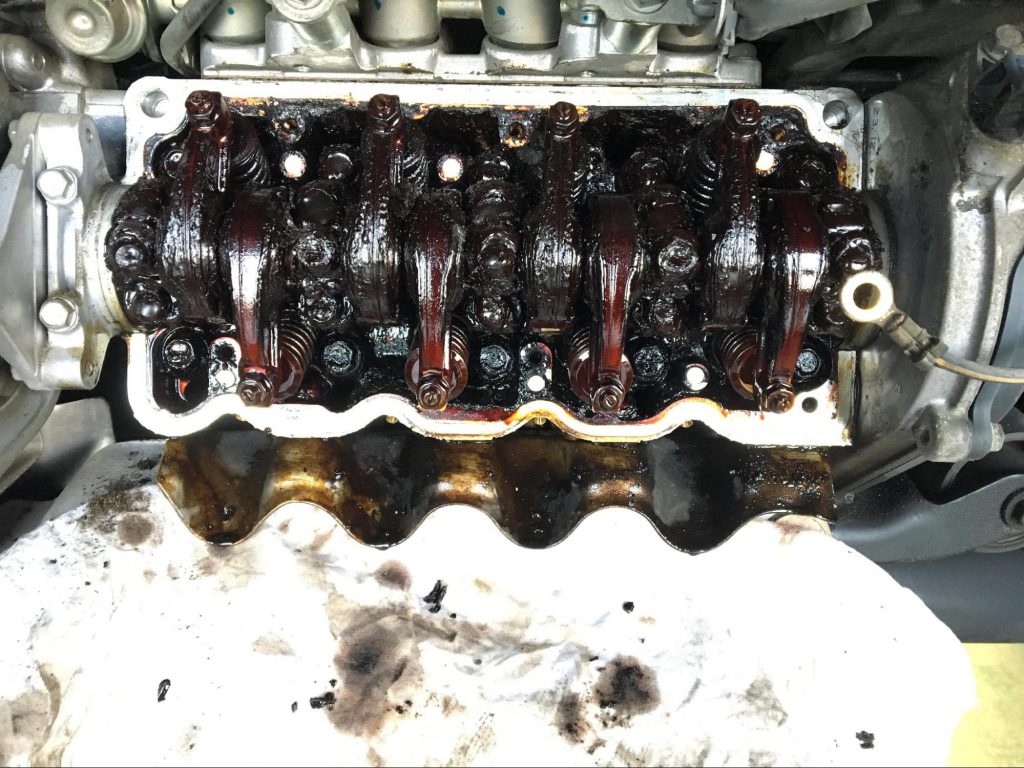
Keeping up with car maintenance can help extend the life of your car. Because have you ever searched: How much does it cost to replace an engine? It’s not pretty.
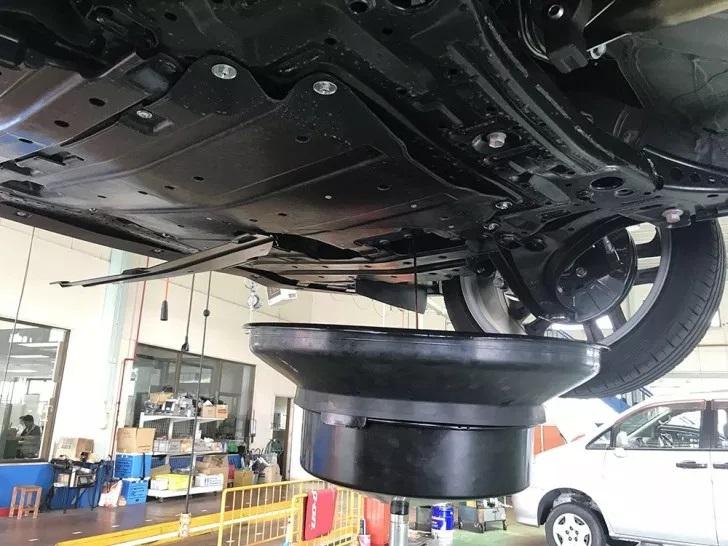
If you get all your ducks in a row, you’ll be done changing oil in about 20 minutes. Start by spreading plastic sheeting on the ground. Then drive your car on top of it. That will eliminate all oil spill cleanup work since you can just toss the entire sheet when you’re done, or keep it for the next change if you’re lucky enough to go spill-free. Jack up the car, set the jack stands in place, and lower the car. If you’re on asphalt, place squares of plywood under the jack stands for support.
Place all your tools on a tray or in a box so everything you need is in one place. That means a box-end wrench for the drain plug, a rubber mallet (Step 1), a filter wrench, a drain pan and the new filter. Before you slide it all under the car, open a new oil bottle and smear clean oil on the new filter’s gasket. Then you’re ready to start the job.
Remove the drain plug and get the old oil flowing. Then remove the oil filter and install the new one. Once the old oil is down to a trickle, install a new gasket on the plug (if required) and tighten it by tapping the box-end wrench with the rubber mallet. Wipe the drips with a rag and you’re done under the car.
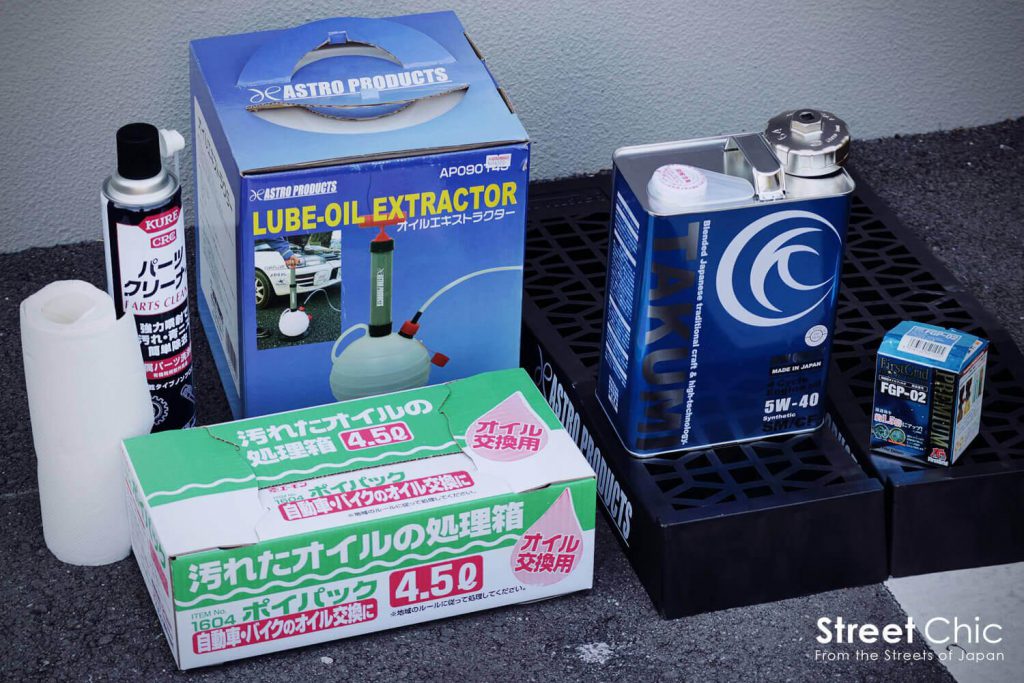
Required Tools for Oil Change. Have the necessary tools for this how to change your oil lined up before you start—you’ll save time and frustration. You’ll also need an oil filter wrench, a funnel and oil pan.
Rags
Rubber mallet
Safety glasses
Wrench set
Required Materials for Oil Change. Avoid last-minute shopping trips by having all your materials ready ahead of time for this how to change oil. Here’s a list:
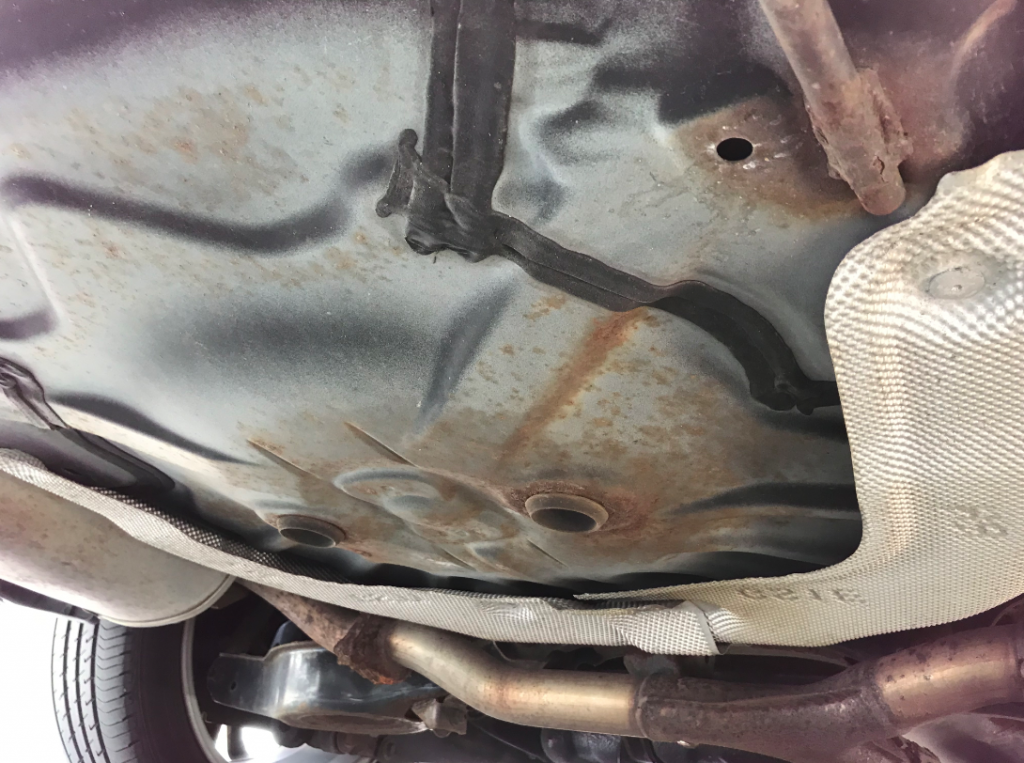
While Japan may have various geographical conditions, it has one of the world's heaviest snowfall regions. Five regions are listed in the world snowfall ranking. In terms of time, snow remains on the street for months from mid-November to March (Longest until May). Under such circumstances, you can easily imagine that rust will be form underneath of vehicles used in daily lives. Also, people in snowy area do not wash their cars frequently because it gets dirty immediately after washing.
However, if it is just snow, cars are very well protected against it. So how does rust occur in cold regions? When iron parts come in contact with oxygen, iron oxide or rust is formed. This process is accelerated by a substance called sodium chloride, commonly used in road-salt or cryoprotectant. During the winter seasons, the roads are often covered with anti-freezing agents. Along with infrequent car washes, rust can develop quickly.
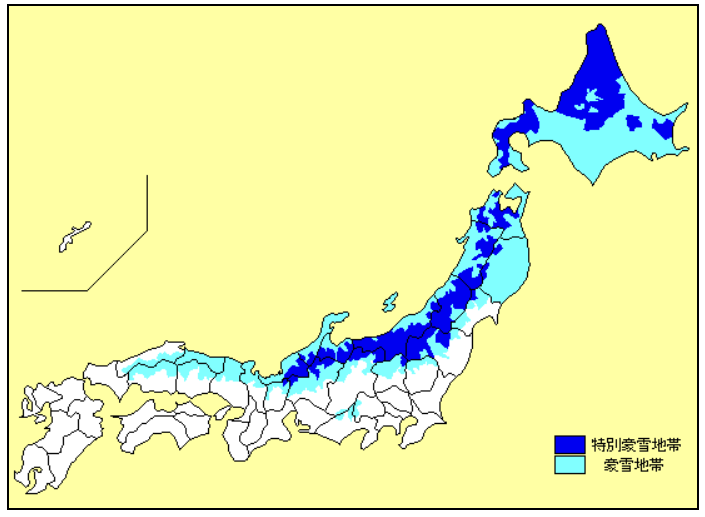
Areas with more snow are shown on the map. When temperatures are low at night, these areas are often laid with anit-freezing agents to prevent the risk of frozen roads. Therefore rust is often seen on vehicles used in such places. Features of this region may affect the price of used cars. If you find cheaper prices from these areas, this may be the reason.
Dark Blue: Heavy snow region / Light Blue: Normal snow region